For the record we looked at having someone build the camper for us, shipping the bus down to them and paying what ended up being a ton of cash for them to handle everything for us. While we probably should have done just that, it would have taken away the "fun" of doing it ourselves and certainly would have limited the creativity as our only options were to decide on paint color and fabric.Were it that we had a woodshop and proper tools, this would have been a lot of fun and i think a relatively quick build. Instead, since we were living in a studio condo, weren't allowed to work in the unit or garage and had only a set of battery powered tools (drill/driver, circular saw and jigsaw) to complete the project... things became a bit "interesting". For lack of a better solution, the bus became our mobile workshop (and canvas). Here's our average day after work assuming decent weather:
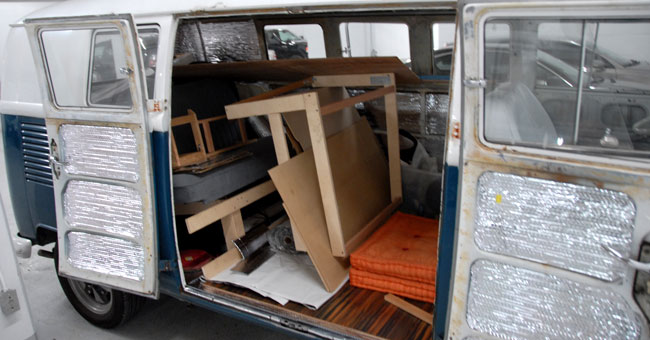
Grab the batteries that have been charging overnight, throw them and the tools in the bus. Load up the makeshift table (which we built from the scraps of our first attempted camper build) and throw it, pieces of wood and other items in the bus. Sit on cushion fashioned to act as seat and drive a few blocks to a local dirt road that leads to an industrial building. Curse the fact that you forgot your tuque (that's canadian for beanie) since we don't have any windows and it's mid winter, but thank the gods of the universe that you appear to have a few hours without rain before dark.
Pull far enough off the side of the dirt road to not get hit by passing semi trucks, and get as much work done as possible before:
a. the batteries die, b. getting kicked out by the security guard, c. it starts raining again or or darkness falls. Here's our typical spot both during the prep/painting and construction phase- and yes, that is a No Parking sign in front of the bus...
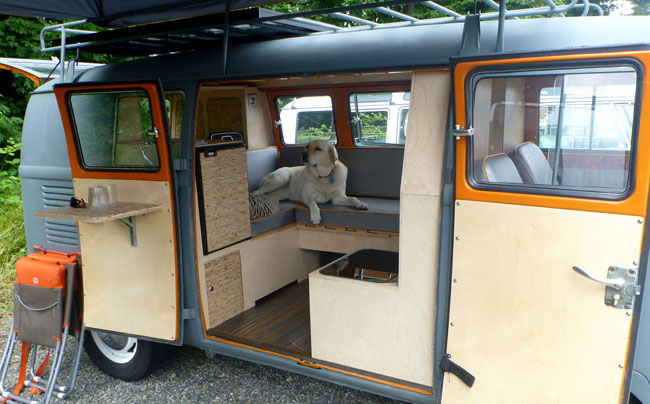
 Not optimal conditions, but we made it work. Several months and a few sheets of plywood later, and jen reminding me about a million times that we aren't building a piano... and things turned out almost looking like a camper.
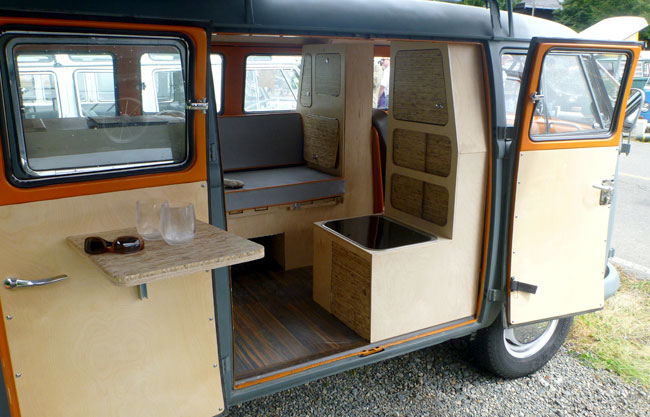
Popup table on rear cargo door; perfect for holding the tunes and happy hour beverage of choice. To the right is our cooktop with kitchen storage above and a space for a water tank below (we still need to add a faucet somewhere on the outer panel).
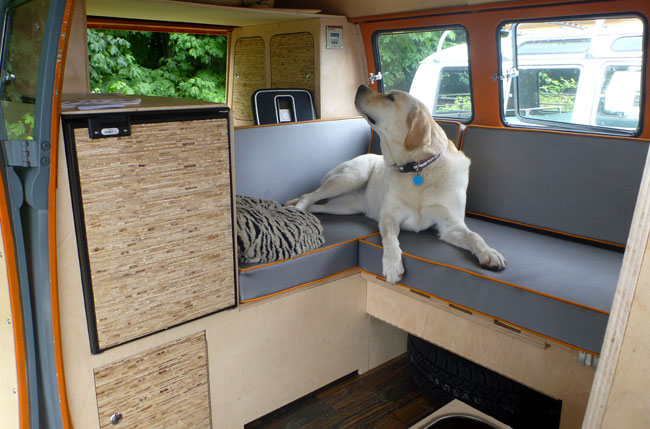
 View of the fridge on the left, the lounge/couch (which Karma claims as her own until told otherwise) with spare tire storage underneath. That space may well prove to be overflow storage if we move the spare to the roof rack).
Since its the most popular question when looking at the interior...the material on the cabinet doors and fridge face isn't bamboo. It's Kirei, another eco-material, made of 100% recycled sorghum root. We found it absolutely beautiful and thought the contrast and texture were perfect for the camper.
 The slats that make up the couch pull out to form our bed. At the front the slats simply latch onto the cooktop cabinet. By the fridge, the two low cabinet doors open to form a base for the bed.
For jen, throw the cushions down and this is all that's needed. I'm a bit longer than this space allows, so the far storage compartment doors fold both up and down so that my feet can pass through (this cabinet holds our bedding, so its always empty when the bed is folded out).
Just don't look too closely at the craftsmanship and all is fine! I highly recommend a table saw before starting your own camper build...but we're proof that it's possible with whatever you've got laying around! I'm honestly not sure this project will ever be entirely "complete", and there are a few things i already would have done differently if we had it to do all over again- but we are at least at the stage where we have a functional camper and (so far) we are loving every second of it!